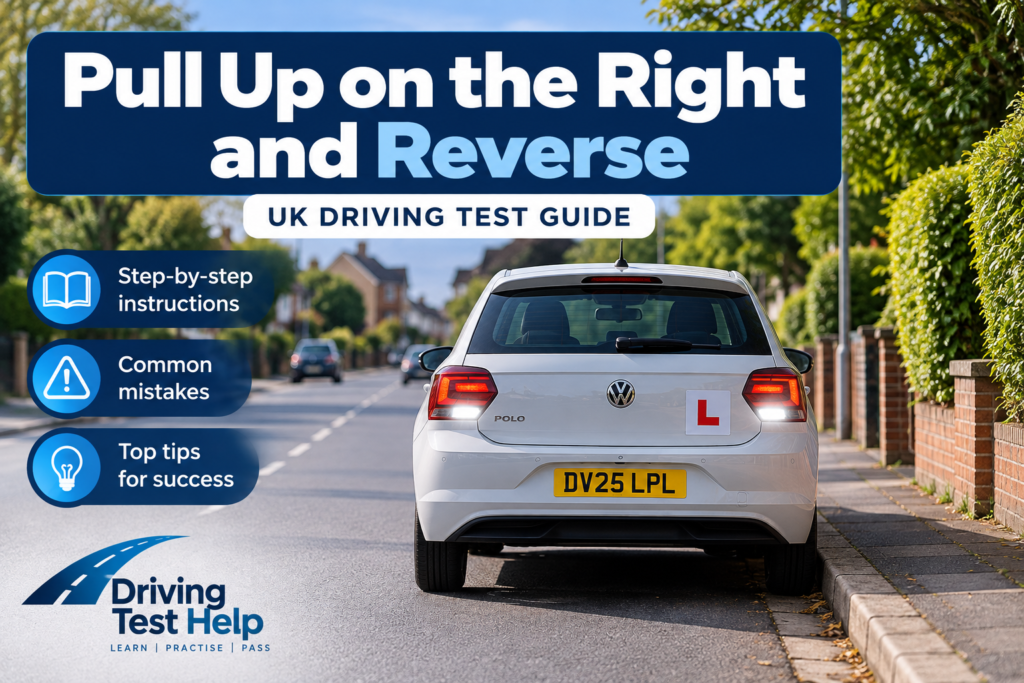
The pull up on the right and reverse manoeuvre is one of the exercises you may be asked to complete during your UK driving test.
To find out more about what to expect on your driving test read our What Happens on Your Driving Test guide.
You’ll be asked to pull up on the right-hand side of the road, stop safely, then reverse for approximately two car lengths while keeping reasonably close to the kerb. You’ll then be asked to rejoin the road safely.
It might sound complicated, but once you break it down into simple steps, it becomes much easier.
What is the pull up on the right and reverse manoeuvre?
During the manoeuvre, your examiner will ask you to:
- Pull up on the right-hand side of the road when it is safe.
- Stop with the car reasonably close to the kerb.
- Reverse for approximately two car lengths.
- Drive forwards when instructed.
- Rejoin the road safely.
The important thing is not to rush. Observation and safety are more important than speed.
Step 1: Find a safe place to pull up
Your examiner will normally give you plenty of warning before asking you to pull up on the right.
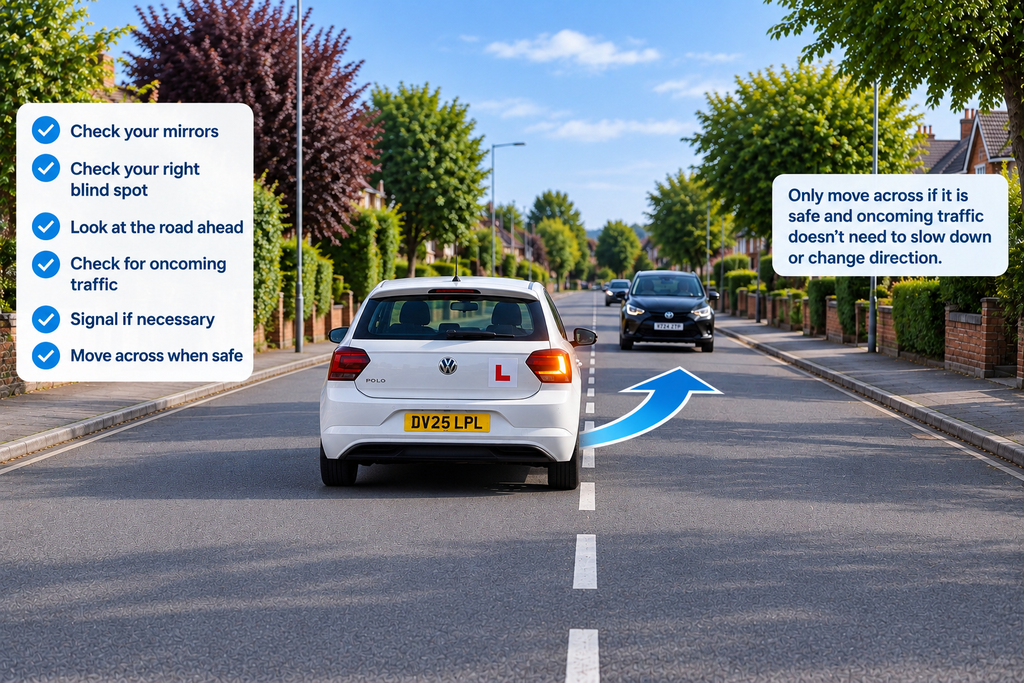
Before moving across the road, check:
- Your interior mirror.
- Your right-hand mirror.
- Your blind spot.
- The road ahead.
- Any vehicles approaching from either direction.
You need to make sure it is safe before crossing towards the opposite side of the road.
Use your right signal if necessary and move across smoothly.
Watch for oncoming traffic
This is one of the most important parts of the manoeuvre.
Do not move across the road if an approaching vehicle would have to slow down, stop or change direction because of you.
If necessary, wait until the road is clear.
Step 2: Stop close to the kerb
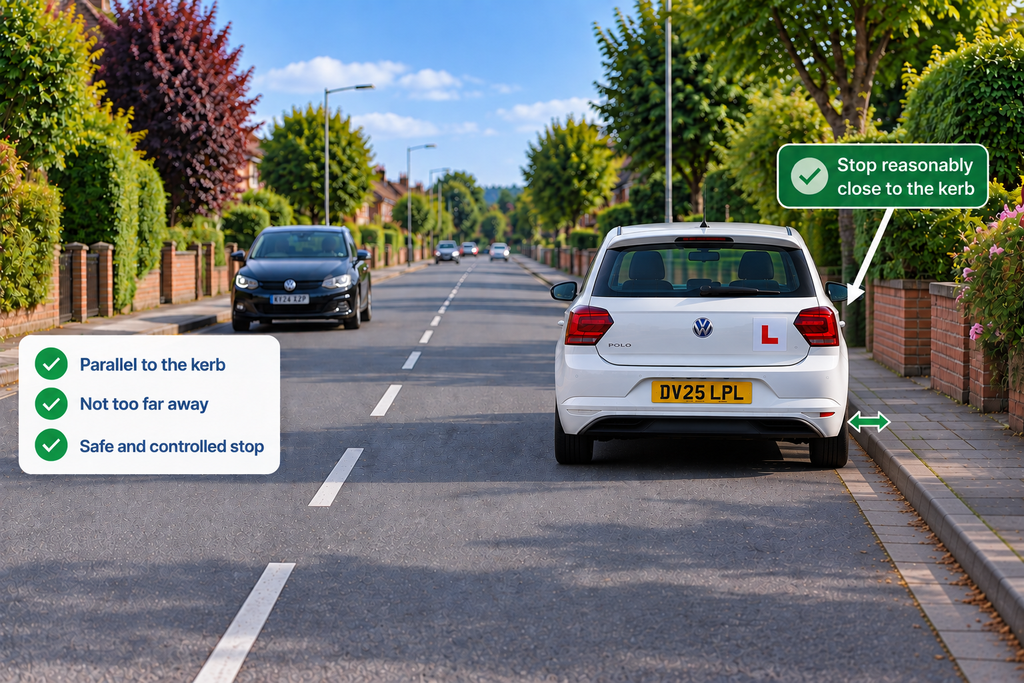
Once you have moved onto the right-hand side, position the car reasonably close to the kerb.
You don’t need to be millimetre-perfect, but avoid leaving a large gap.
Stop the car safely and securely.
Apply the parking brake if appropriate and select neutral or park, depending on the car.
Step 3: Prepare to reverse
Before reversing, carry out your observations carefully.
Check:
- All around the car.
- The pavement.
- Driveways and entrances.
- Pedestrians.
- Cyclists.
- Vehicles approaching from either direction.
- Anything that could move into your path.
Remember that pedestrians can appear quickly, particularly from behind parked vehicles.
Step 4: Reverse approximately two car lengths
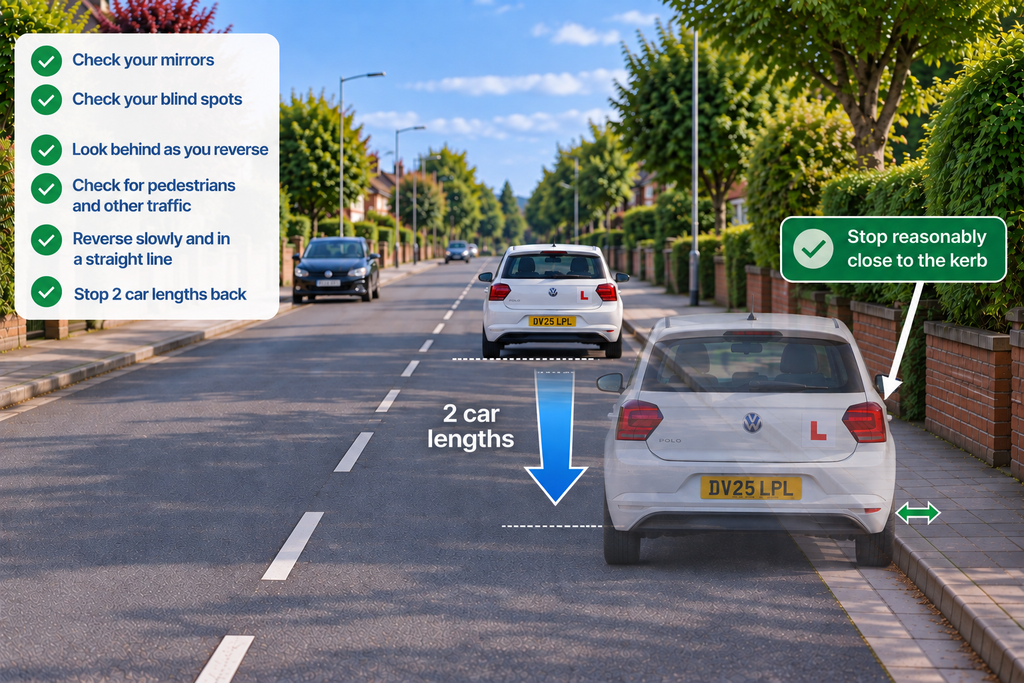
Select reverse and begin moving backwards slowly.
You should keep the car reasonably close to the kerb while reversing.
The examiner isn’t looking for you to reverse at a particular speed. Slow and controlled is the aim.
Keep checking all around the vehicle throughout the manoeuvre.
Don’t simply stare over your shoulder for the entire time. Your observations should be appropriate to what is happening around you.
How far should you reverse?
The instruction is normally to reverse approximately two car lengths.
You don’t need to measure this precisely.
The examiner is looking for a controlled reverse for roughly the required distance while maintaining good observation and control.
Step 5: Stop when instructed
Once you’ve reversed approximately two car lengths, your examiner will normally ask you to stop.
Bring the car to a controlled stop.
Don’t worry if you haven’t stopped at exactly the same point you had imagined. The manoeuvre is assessed as a whole, including your control, accuracy and observations.
Step 6: Rejoin the road safely
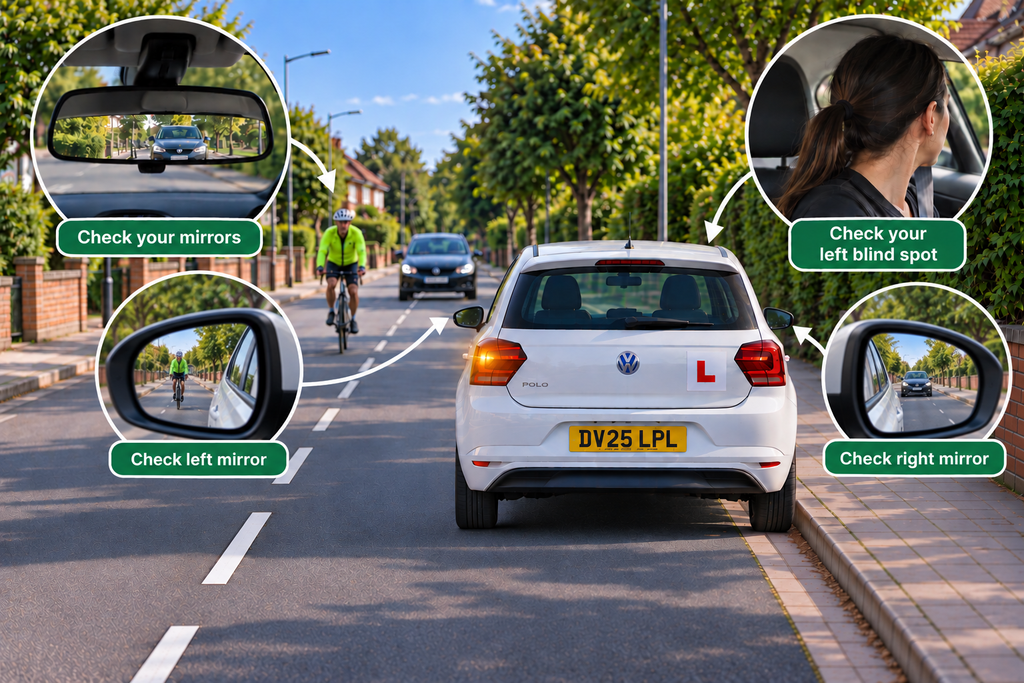
Your examiner will then ask you to drive on when it is safe.
This is another important observation point.
Before moving away:
- Check your mirrors.
- Check your blind spot.
- Look around for pedestrians, cyclists and other vehicles.
- Signal if necessary.
- Make sure the road is clear.
- Move off under control.
Don’t rush away simply because you’ve completed the reversing part.
Common mistakes on pull up on the right and reverse
1. Poor observation before crossing the road
Moving across the road without checking properly can create a serious safety problem.
Take your time and make sure it is safe before crossing.
2. Pulling up too far from the kerb
Try to finish reasonably close to the kerb.
You don’t need perfect accuracy, but a large gap can indicate poor control or positioning.
3. Reversing too quickly
There’s no prize for finishing first.
A slow, controlled reverse gives you more time to observe and react.
4. Not checking all around the car
Good observation is essential.
Keep checking your surroundings throughout the manoeuvre, especially for pedestrians, cyclists and other road users.
5. Forgetting the final blind-spot check
You’ve completed the manoeuvre, but you’re not finished yet.
Before moving away, make sure it is safe to rejoin the road.
6. Getting flustered if something happens
If another road user approaches while you’re reversing, don’t panic.
If necessary, stop and wait.
Safety comes first.
For help with controlling your nerves on test day read our Staying Calm on Test Day guide.
Can you fail your driving test for this manoeuvre?
You can receive a driving fault if you make a minor error during the manoeuvre.
However, a serious or dangerous fault can result in a test failure.
For example, creating a situation where another road user has to take avoiding action could be much more serious than simply finishing slightly further from the kerb than intended.
Your examiner is assessing how safely and competently you deal with the situation, not whether you can perform the manoeuvre perfectly.
What if you need to stop during the manoeuvre?
That’s fine if you need to stop because something changes around you.
For example, if a pedestrian walks behind the car or another vehicle approaches, stopping and waiting until it is safe can be exactly the right thing to do.
Don’t feel pressured to keep moving.
Do you need to get it perfect?
No.
The driving test isn’t a parking competition.
You are expected to demonstrate:
- Good control of the car.
- Effective observation.
- Appropriate speed.
- Safe positioning.
- Consideration for other road users.
- The ability to respond safely when circumstances change.
A small positioning error does not automatically mean you’ve failed.
Pull up on the right: quick checklist
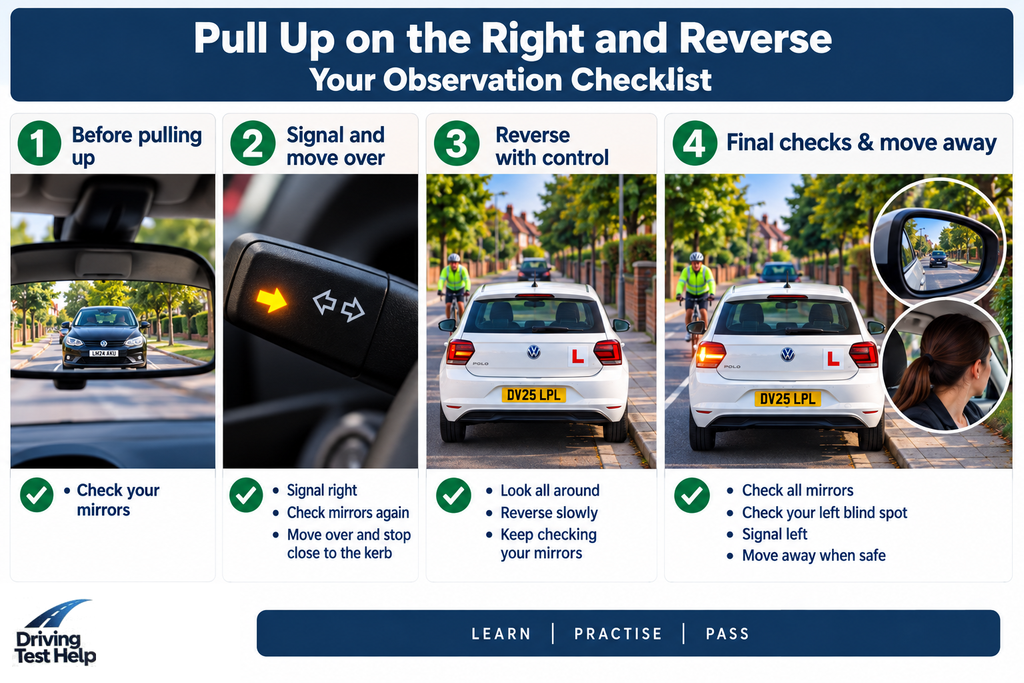
Before moving across the road:
Mirrors → right blind spot → road ahead → signal if necessary → move when safe
When stopped:
Secure the car → observe all around → prepare to reverse
While reversing:
Slow speed → steer smoothly → keep reasonably close to the kerb → keep observing
Before moving away:
Mirrors → blind spot → signal if necessary → all-around observation → move when safe
Top tips for the pull up on the right
Take your time. There is no need to rush.
Prioritise observation. Knowing what is happening around your car is more important than making the manoeuvre look perfect.
Keep your speed very slow when reversing. This gives you much more control.
Don’t panic if another vehicle appears. Stop if necessary and wait.
Don’t forget the final observations. Completing the reverse is only part of the exercise.
Practise on different roads. Don’t rely on learning one particular location or one set of reference points.
Final thoughts
The pull up on the right manoeuvre becomes much easier when you stop thinking of it as one big exercise.
Break it down:
Find a safe place → observe → pull up → observe again → reverse slowly → stop → observe → rejoin safely.
If you can consistently demonstrate good observation, control and consideration for other road users, you’ll be well prepared for this part of your driving test.
For more help preparing for your driving test, explore our other useful guides:
Parallel Parking – Learn how to complete the manoeuvre safely and accurately
Bay Parking – Step-by-step help for manoeuvring into a bay
What to Take on Your Driving Test – So you’re fully prepared for the day.
Driving Test Car Requirements – If you’re taking your own car for the test.
Driving Test Tips – Practical test tips to help you prepare for your test day and pass
Driving Test Checklist Everything worth checking before your test